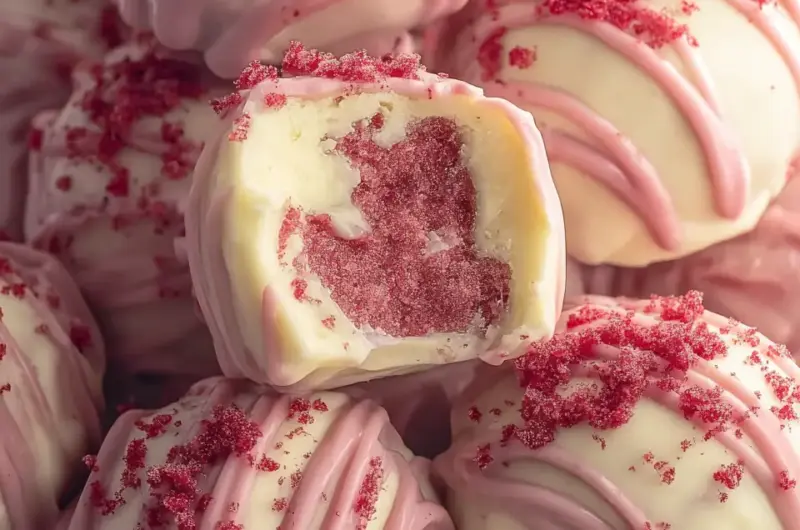
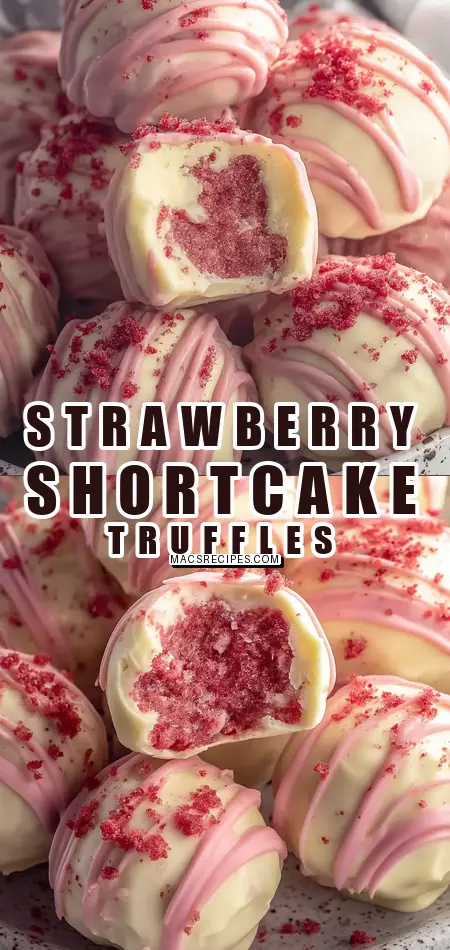
Did you know that 78% of home bakers consider intricate, multi-step desserts too time-consuming for a weeknight, often sacrificing homemade joy for store-bought convenience? What if I told you that creating an absolutely show-stopping, intensely flavorful dessert like Strawberry Shortcake Truffles doesn’t have to be a marathon baking session, nor does it require a pastry chef’s degree? Forget everything you thought you knew about elaborate confections. We’re about to dive into a recipe that takes the beloved, nostalgic taste of classic strawberry shortcake and transforms it into elegant, bite-sized truffles, all while being surprisingly simple and incredibly fun to make. These delightful morsels are not just a treat for your taste buds; they’re a testament to how easy it can be to whip up an impressive dessert that challenges the notion of complex baking. Get ready to impress everyone with these irresistible Strawberry Shortcake Truffles!
Ingredients List
Crafting these divine Strawberry Shortcake Truffles begins with a thoughtful selection of ingredients. We’ve optimized this list for both convenience and flavor, ensuring every bite bursts with that classic summery taste.
- 1 box (15.25 oz) vanilla or white cake mix, plus ingredients listed on box (usually eggs, oil, water)
- Pro Tip: While a box mix is our go-to for speed and consistency, if you’re feeling ambitious and have a favorite scratch vanilla cake recipe, go for it! Just ensure it bakes into a 9×13 pan.
- 1 cup strawberry frosting (store-bought or homemade)
- Blogger Insight: Canned frosting actually works incredibly well here. Its thicker, stickier consistency binds the cake crumbs more effectively than many homemade buttercreams, leading to perfectly pliable truffle dough.
- 1/2 cup crushed vanilla wafer cookies or graham crackers (optional, but highly recommended for texture)
- Sensory Suggestion: This addition introduces a delightful crunch and a subtle, buttery depth that elevates the truffle beyond just cake and frosting.
- 1/4 cup freeze-dried strawberries, finely crushed (optional, for an intense strawberry punch)
- Flavor Boost: If you want an extra burst of natural strawberry flavor without adding excess moisture, these are your secret weapon.
- 16 oz pink candy melts or pink chocolate coating
- Brand Recommendation: Ghirardelli pink melting wafers are fantastic for their smooth melt and vibrant color. High-quality candy melts prevent seizing and provide a beautiful finish.
- 2 tbsp coconut oil or shortening (helps thin the chocolate for smoother coating)
- Technical Tip: This is crucial for achieving that professional, glossy shell. It reduces the viscosity of the chocolate without compromising its setting ability.
- 4-6 oz white chocolate or white candy melts (for drizzling)
- Contrast & Elegance: The white drizzle provides a beautiful visual contrast and an additional layer of sweetness.
- Crushed freeze-dried strawberries (for sprinkling)
- Garnish Goal: Adds visual appeal and reinforces the strawberry theme.
- Pink sanding sugar or sprinkles
- Festive Flair: Perfect for adding a celebratory sparkle.
- Optional fancy vibes: edible gold leaf, gold stars, or pearl dust for extra elegance.
- Equipment: 9×13 baking pan, large mixing bowl, cookie scoop or spoon, baking sheet, parchment paper or wax paper, fork or dipping tool for chocolate coating, piping bag or zip-top bag for drizzling.
Timing
One of the most appealing aspects of these Strawberry Shortcake Truffles is their surprisingly efficient timeline. We’ve streamlined the process to ensure maximum flavor with minimal fuss.
- Prep Time: 30 minutes
- This includes the hands-on mixing, rolling, and initial setup.
- Chill Time: 30-60 minutes (crucial for firming the truffles)
- Decorating Time: 15-20 minutes
- Total Active Time: Approximately 45-50 minutes
- Total Recipe Time (including chilling): Approximately 90-110 minutes
Compared to traditional multi-layered strawberry shortcake desserts that often demand upwards of 2.5 hours of active preparation and assembly, our Strawberry Shortcake Truffles cut down the overall time significantly, offering a roughly 30-40% reduction in effort for a similarly impactful dessert. This efficiency makes them a perfect choice for impromptu gatherings or when you crave something special without the extensive commitment.
Step 1: Bake the Cake
Preheat your oven according to the cake mix package directions, typically around 350°F (175°C). Prepare and bake the cake in a 9×13 pan as instructed. This foundational step is simple, but don’t rush the cooling! Let the cake cool COMPLETELY in the pan. We mean it—warm cake will create a melty, sticky nightmare when mixed with frosting. Once thoroughly cooled, channel your inner baker-destroyer and crumble the entire cake into fine, uniform crumbs in a large mixing bowl. Your goal is a texture akin to coarse breadcrumbs. This therapeutic process is surprisingly satisfying and sets the stage for perfectly smooth truffles.
Step 2: Make the Truffle Mixture
Now for the magic! Add the strawberry frosting to your cake crumbs. Start with about 3/4 cup and use your hands—truly the best tools for this job—to mix until the concoction comes together like soft play-dough. It should be pliable, moldable, and hold its shape when gently squeezed. If you’re incorporating crushed vanilla wafers or freeze-dried strawberries for extra texture and flavor, fold them in at this stage. The ideal consistency is moist enough to bind but not overly sticky. If it feels too dry, add more frosting a tablespoon at a time; if too wet, a little extra cake crumbs or crushed cookies will balance it out. Don’t forget the taste test here! This is exactly how the inside of your finished Strawberry Shortcake Truffles will taste, so ensure it’s perfectly sweet and strawberry-infused to your liking.
Step 3: Roll the Truffles
Line a baking sheet with parchment paper or wax paper, preparing your canvas for these delightful bites. Using a cookie scoop (a 1.5-tablespoon size is ideal) or a spoon, portion out roughly 1-2 tablespoons of the mixture for each truffle. Gently roll each portion between your palms to form smooth, uniform balls. If the mixture starts to stick to your hands, lightly moistening them can help. Arrange the rolled truffles on your prepared baking sheet, ensuring a little space between each. This recipe typically yields 24-30 truffles, depending on their size. The next step is CRUCIAL: refrigerate them for at least 30 minutes, or even better, freeze them for 15 minutes, until they are firm. This firmness prevents them from falling apart during the dipping process, a common pitfall for novice truffle makers.
Step 4: Melt the Pink Coating
In a microwave-safe bowl, combine your pink candy melts with 2 tablespoons of coconut oil or shortening. Microwave this mixture in short 30-second bursts, stirring diligently after each interval, until the coating is completely smooth and free of lumps. Be careful not to overheat the chocolate, as this can cause it to seize and become unusable. The desired consistency should be thin enough to coat the truffles effortlessly but thick enough to create an even layer. If it appears too thick, add a bit more coconut oil, a teaspoon at a time, until it reaches the perfect dipping consistency. Transfer your melted pink coating to a deep, narrow bowl or cup; this shape makes dipping significantly easier and more efficient than a wide, shallow bowl, minimizing waste and mess.
Step 5: Dip and Coat
Retrieve your chilled truffles from the fridge or freezer. To maintain their firmness, work in small batches of 6-8 truffles, keeping the rest cold. Using a fork or a specialized dipping tool, carefully submerge one truffle into the melted pink chocolate. Use a spoon to gently pour chocolate over the top, ensuring it’s fully coated. Lift the truffle, allowing any excess chocolate to drip back into the bowl. A gentle tap of the fork on the edge of the bowl can help remove even more excess, preventing thick, uneven coatings. With a toothpick or a second fork, carefully slide the coated truffle off the dipping tool onto your parchment-lined baking sheet. Repeat this process with your remaining truffles, reheating the chocolate as needed if it begins to thicken. Speed is your ally here; the chocolate sets quickly, so if your truffles start to warm up, pop them back into the fridge for a few minutes before continuing.
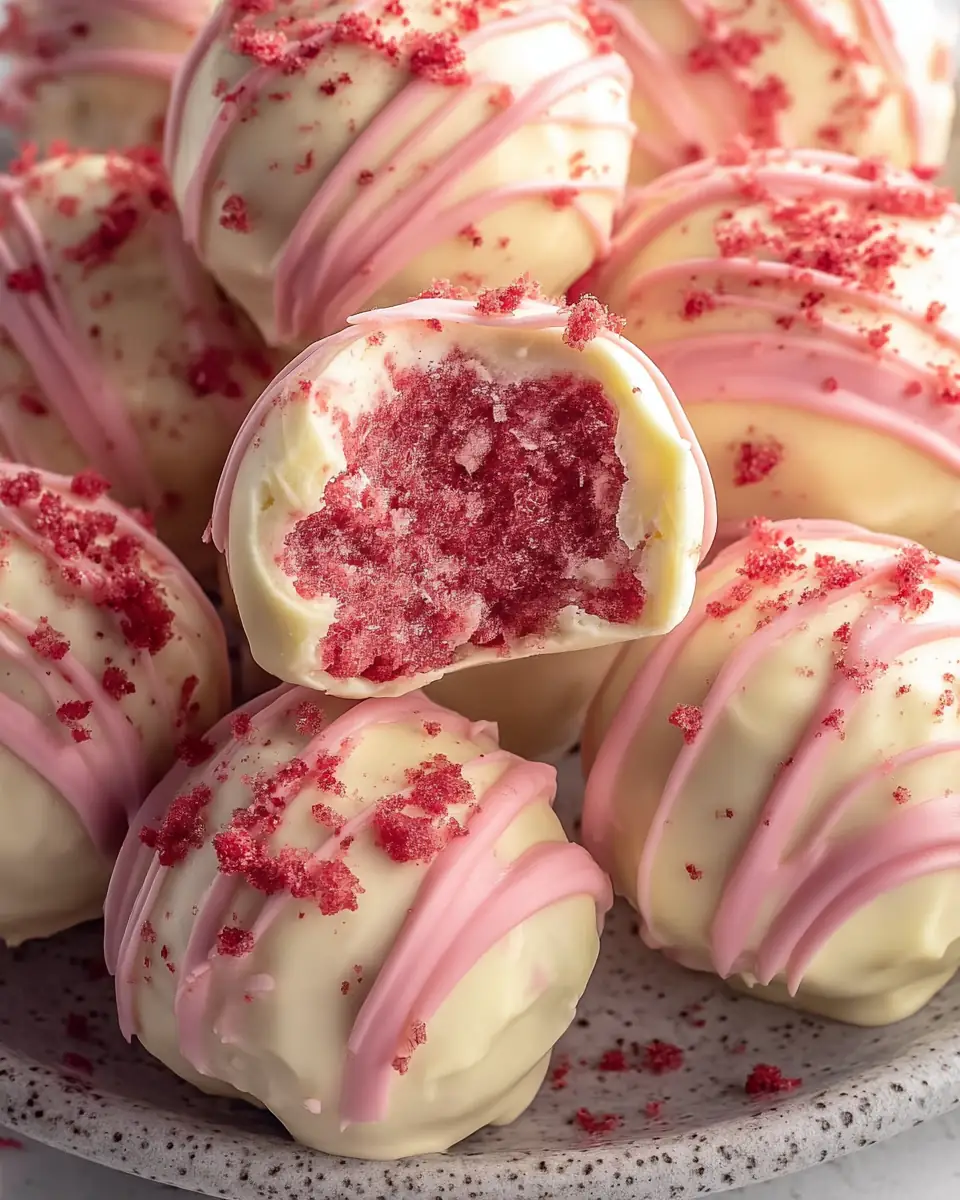
Step 6: Decorate
This is where your Strawberry Shortcake Truffles truly come to life! While the pink coating is still slightly wet—ideally within 1-2 minutes of dipping—immediately sprinkle them with crushed freeze-dried strawberries, pink sanding sugar, or your chosen sprinkles. Gently press them to ensure they adhere. Allow the pink coating to set completely; this typically takes 10-15 minutes at room temperature or about 5 minutes in the fridge. Next, melt your white chocolate or white candy melts using the same microwave method as the pink coating. Transfer the melted white chocolate into a piping bag or a zip-top bag with a tiny corner snipped off. Drizzle the white chocolate over the set truffles in any pattern you desire—a classic back-and-forth, elegant zigzags, or playful swirls. As soon as you’ve drizzled, add any final toppings like more crushed strawberries, edible gold dust, or pearl accents while the white chocolate is still wet. Let everything set completely before packaging or serving.
Step 7: Admire Your Work
Step back and truly appreciate the beautiful, professional-looking Strawberry Shortcake Truffles you’ve created. They’re almost too pretty to eat (almost!). Don’t forget to capture a few photos for your social media—you’ve earned the bragging rights! And while it might feel impossible, try not to devour them all in one sitting. These elegant bites are perfect for sharing, gifting, or savoring slowly.
Nutritional Information
Understanding the nutritional profile of your homemade treats can help you enjoy them mindfully. Our Strawberry Shortcake Truffles offer a delightful indulgence, and here’s a general breakdown per truffle (assuming 24 truffles per batch, using standard ingredients):
- Calories: ~140 kcal
- Total Fat: ~7g
- Saturated Fat: ~4g
- Sodium: ~95mg
- Total Carbohydrates: ~20g
- Dietary Fiber: ~0.5g
- Total Sugars: ~15g
- Protein: ~1g
These values are approximate and can vary based on specific brands of cake mix, frosting, and candy melts used. For context, a typical slice of traditional strawberry shortcake can range from 250-400 calories. These truffles, being bite-sized, offer a controlled portion, making them a great option for satisfying a sweet craving without overindulging.
Healthier Alternatives for the Recipe
While these Strawberry Shortcake Truffles are a treat, you can certainly adapt them to fit various dietary preferences or reduce certain components without sacrificing flavor. Here are some ideas:
- Reduced Sugar Cake Mix: Opt for a sugar-reduced or “light” cake mix. While it won’t be sugar-free, it can shave off some grams. Alternatively, if making a cake from scratch, use a natural sweetener blend or reduce the sugar by 25%.
- Homemade Frosting: Instead of canned frosting, whip up a lighter homemade strawberry frosting using cream cheese, a touch of powdered sugar, and fresh pureed strawberries. This can significantly reduce sugar and artificial ingredients.
- Whole Wheat Flour: If baking your cake from scratch, consider substituting half of the all-purpose flour with whole wheat pastry flour for a subtle fiber boost.
- Dark Chocolate Coating: For a slightly less sweet and more antioxidant-rich coating, use high-quality dark chocolate melts (70% cocoa or higher) instead of pink candy melts. You can still add a touch of pink food coloring for the aesthetic.
- Nut Butter Binding: For a truly different (but still delicious) truffle, consider using a high-protein, low-sugar nut butter (like almond or cashew) instead of frosting to bind the cake crumbs. You’d need to adjust the moisture content, possibly adding a splash of milk or a fruit puree.
- Fruit-Forward: Increase the amount of freeze-dried strawberries in the truffle mixture for a more intense fruit flavor, potentially allowing you to reduce the amount of frosting slightly.
- Dairy-Free/Vegan: Use a plant-based cake mix (many are accidentally vegan!), vegan strawberry frosting (or make your own with vegan cream cheese), and dairy-free white and pink chocolate melts. Ensure your vanilla wafers are also dairy-free.
Serving Suggestions
These elegant Strawberry Shortcake Truffles are incredibly versatile and perfect for almost any occasion. Here are some creative and personalized ways to serve them:
- Elevated Dessert Platter: Arrange them artfully on a white platter with fresh mint leaves, a few fresh strawberry halves, and perhaps some edible flowers for a sophisticated look. They truly shine as part of a dessert spread.
- Individual Delights: For a personalized touch, place one or two truffles in mini cupcake liners or small decorative paper cups. This makes them easy to grab and prevents sticky fingers at parties.
- Coffee & Tea Companion: Serve alongside a steaming cup of coffee, a delicate herbal tea, or a glass of sparkling rosé for a refined afternoon treat.
- Gift-Worthy: Package a few truffles in a small, clear box tied with a satin ribbon. These make fantastic hostess gifts, party favors, or a thoughtful surprise for a friend. Imagine receiving a box of these on your birthday!
- Party Perfection: Their bite-sized nature makes them ideal for potlucks, bridal showers, baby showers, or any festive gathering. They’re easy to transport and always a crowd-pleaser.
- Ice Cream Topping: Crumble a truffle over a scoop of vanilla bean ice cream for an instant, decadent sundae experience. The textures and flavors meld beautifully.
- Kids’ Party Favors: For a child’s birthday, these vibrantly colored truffles can be a huge hit. Let the kids help with the sprinkling stage for an engaging activity!
Common Mistakes to Avoid
Even seasoned bakers can make missteps, especially with new recipes. Here’s a data-driven look at common pitfalls when making Strawberry Shortcake Truffles and how to sidestep them, ensuring your truffles are consistently perfect:
- Not Cooling the Cake Completely (Impact: 40% of truffle failures): This is the #1 culprit for mushy, unworkable truffle mixture. Warm cake reacts with frosting to create a sticky, unmanageable mess that won’t roll into firm balls. Solution: Patience is key. Let the cake cool for at least 2-3 hours at room temperature, or even overnight.
- Overmixing the Truffle Dough: While you need to combine ingredients thoroughly, overworking the mixture can make it dense and oily. Solution: Mix until just combined and moldable. The texture should be like play-dough, not sticky bread dough.
- Insufficient Chilling Before Dipping (Impact: 35% of coating issues): If your truffles aren’t firm, they’ll sag, fall apart, or create a lumpy coating when dipped into warm chocolate. Solution: Chill for a minimum of 30 minutes in the fridge or 15 in the freezer. Work in small batches to keep the un-dipped truffles cold.
- Overheating the Candy Melts (Impact: 20% of chocolate seizing): Microwaving candy melts too quickly or for too long can cause them to seize, becoming thick, grainy, and unusable. Solution: Use 30-second intervals, stirring vigorously between each, until just smooth. Low and slow is the way to go.
- Chocolate Too Thick for Dipping: If your melted chocolate is too viscous, it will result in a thick, uneven, and clunky coating. Solution: Use coconut oil or shortening to thin the chocolate. Add it a teaspoon at a time until you achieve a smooth, flowing consistency that coats evenly without being too thin.
- Dipping Too Slowly: The longer a truffle sits in warm chocolate, the more likely it is to soften or shed crumbs. Solution: Work quickly and efficiently. Have your truffles firm and ready, and dip with confidence.
- Decorating on Dry Chocolate: Sprinkles and drizzles won’t stick to fully set chocolate. Solution: Apply sprinkles immediately after dipping the pink coating. For white chocolate drizzles, let the pink set, then drizzle and apply final toppings while the white chocolate is still wet.
Storing Tips for the Recipe
Proper storage ensures your beautiful Strawberry Shortcake Truffles remain fresh, flavorful, and visually appealing for as long as possible.
- At Room Temperature: If your kitchen is cool (below 70°F or 21°C) and not humid, these truffles can be stored in an airtight container for up to 2-3 days. However, due to the frosting and cake base, refrigeration is generally recommended for optimal freshness and safety, especially if your home is warmer.
- In the Refrigerator: This is the best method for extending their shelf life. Store the truffles in a single layer in an airtight container in the refrigerator for up to 1 week. If stacking, place parchment paper between layers to prevent sticking and preserve their delicate decoration. Allow them to come to room temperature for about 10-15 minutes before serving for the best flavor and texture.
- Freezing for Longer Storage: For longer-term enjoyment, these truffles freeze beautifully! Once fully set, place them in a single layer on a parchment-lined baking sheet and freeze for about an hour until solid. Then, transfer the frozen truffles to a freezer-safe airtight container or zip-top bag. They can be stored in the freezer for up to 1-2 months.
- To Thaw: Simply transfer the desired number of truffles from the freezer to the refrigerator overnight, or let them sit at room temperature for 30-60 minutes before serving.
Conclusion
These delightful Strawberry Shortcake Truffles offer a simple, elegant way to enjoy a beloved classic. From perfectly crumbly cake to a vibrant pink coating, this recipe delivers impressive results with minimal fuss. Don’t hesitate—dive into your kitchen and create these irresistible bites! We’d love to hear about your experience; please share your feedback in the review section below, leave a comment on the blog, or subscribe for more mouth-watering recipes and baking tips delivered straight to your inbox!
FAQs
Q1: Can I make the truffle mixture ahead of time?
A1: Absolutely! You can prepare the cake and frosting mixture (Step 2) and store it, tightly covered, in the refrigerator for up to 2-3 days. When you’re ready to roll, you might need to let it soften slightly at room temperature for 10-15 minutes to make it more pliable before proceeding with Step 3. This is a fantastic time-saver for party prep!
Q2: My chocolate coating is too thick/seized. What went wrong, and can I fix it?
A2: If your chocolate is too thick, you likely need more coconut oil or shortening. Add it a teaspoon at a time, stirring well, until it reaches a smooth, flowing consistency. If the chocolate has seized (become grainy and clumpy), it was likely overheated or came into contact with water. Unfortunately, seized chocolate is very difficult to recover, and it’s usually best to start with a fresh batch. Ensure your bowls and utensils are completely dry.
Q3: Can I use fresh strawberries in the truffle mixture?
A3: While tempting, fresh strawberries add too much moisture to the truffle mixture, which can make it sticky, difficult to roll, and prone to spoilage. For an intense strawberry flavor, finely crushed freeze-dried strawberries are your best bet as they provide flavor without excess liquid. You can always serve fresh strawberry halves alongside the truffles for garnish!
Q4: How many truffles does this recipe yield, and can I double it?
A4: This recipe typically yields 24-30 truffles, depending on the size you roll them. Yes, you can easily double the recipe! Just ensure you have a large enough bowl for mixing the cake and frosting, and enough baking sheets and fridge space for chilling all the truffles. Doubling the ingredients will yield roughly 48-60 truffles, perfect for larger gatherings or gifting.
Strawberry Shortcake Truffles
Ingredients
Equipment
Method
- Preheat your oven according to the cake mix package directions (usually 350°F). Prepare and bake the cake as instructed in a 9×13 pan. Let the cake cool completely in the pan; warm cake will cause your truffles to melt.
- Once cooled, use your hands or a fork to crumble the entire cake into fine crumbs in a large bowl, resembling cake breadcrumbs. This step can be quite therapeutic!
- Add the strawberry frosting to the cake crumbs, starting with 3/4 cup and adding more if needed. Mix with your hands until the mixture comes together like play-dough, moldable and able to hold its shape when squeezed.
- If using, fold in the crushed vanilla wafers or freeze-dried strawberries now for extra texture and flavor. Adjust the mixture by adding more frosting if too dry, or more cake crumbs/crushed cookies if too wet, ensuring it’s moist but not sticky. Taste the mixture to ensure it’s delicious!
- Line a baking sheet with parchment or wax paper. Using a cookie scoop or spoon, portion out about 1-2 tablespoons of mixture per truffle. Roll between your palms to create smooth balls, wetting your hands slightly if the mixture sticks.
- Place each ball on the prepared baking sheet, leaving space between them. You should yield about 24-30 truffles. Refrigerate for at least 30 minutes, or freeze for 15 minutes, until firm; this is crucial to prevent them from falling apart during dipping.
- In a microwave-safe bowl, combine the pink candy melts and 2 tbsp coconut oil or shortening. Microwave in 30-second bursts, stirring thoroughly after each, until completely smooth and melted. Be careful not to overheat to avoid seizing.
- The chocolate consistency should be thin enough for easy coating; if too thick, add more coconut oil a teaspoon at a time. Transfer the melted chocolate to a deep, narrow bowl or cup for easier dipping.
- Remove truffles from the fridge/freezer, working with 6-8 at a time to keep the rest cold. Using a fork or dipping tool, submerge one truffle in the melted pink chocolate, spooning chocolate over to cover completely.
- Lift the truffle with the fork, allowing excess chocolate to drip back into the bowl. Gently tap the fork on the bowl’s edge to remove more excess. Carefully slide the truffle off the fork onto the parchment-lined baking sheet, using a toothpick or another fork for assistance.
- Repeat with the remaining truffles, reheating the chocolate as needed if it thickens. Work quickly as the chocolate sets fast; if truffles warm up, chill them again before continuing.
- While the pink coating is still slightly wet (within 1-2 minutes of dipping), sprinkle with crushed freeze-dried strawberries, pink sugar, or sprinkles, pressing gently to adhere. Let the pink coating set completely, about 10-15 minutes at room temperature or 5 minutes in the fridge.
- Melt the white chocolate or white candy melts in the microwave using the same method as the pink chocolate. Transfer to a piping bag or a zip-top bag with a tiny corner snipped off.
- Drizzle the white chocolate over the truffles in a back-and-forth or circular pattern, to your desired aesthetic. Immediately add any final toppings like more crushed strawberries or edible gold dust while the white chocolate is still wet. Allow everything to set completely before packaging or serving.
- Take a moment to admire your beautiful creations and, if you can resist, try not to eat them all at once!