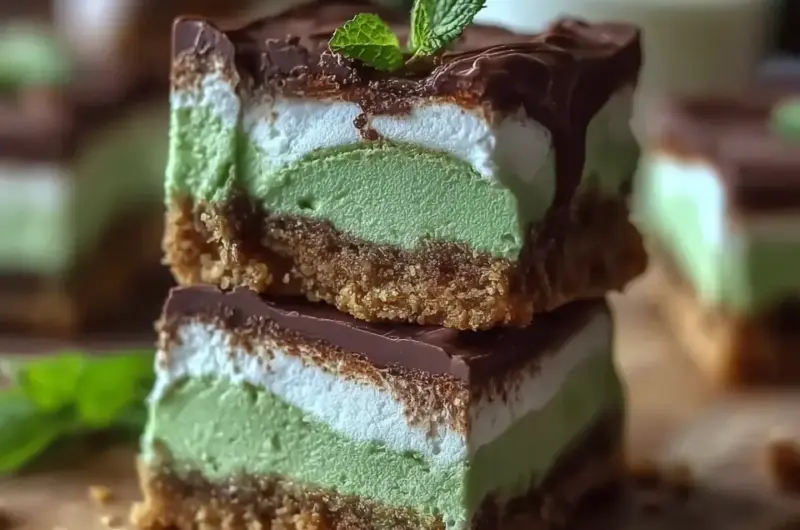
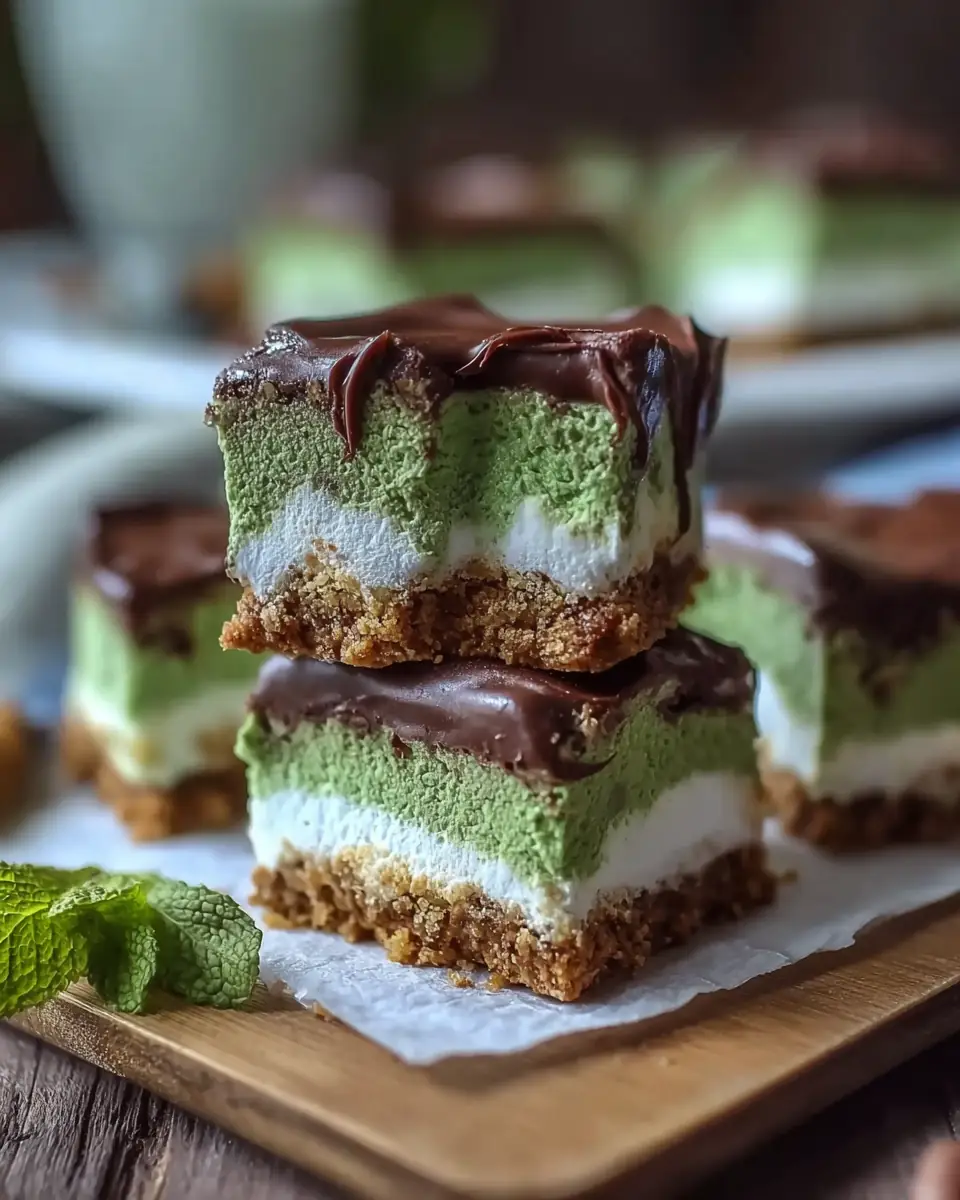
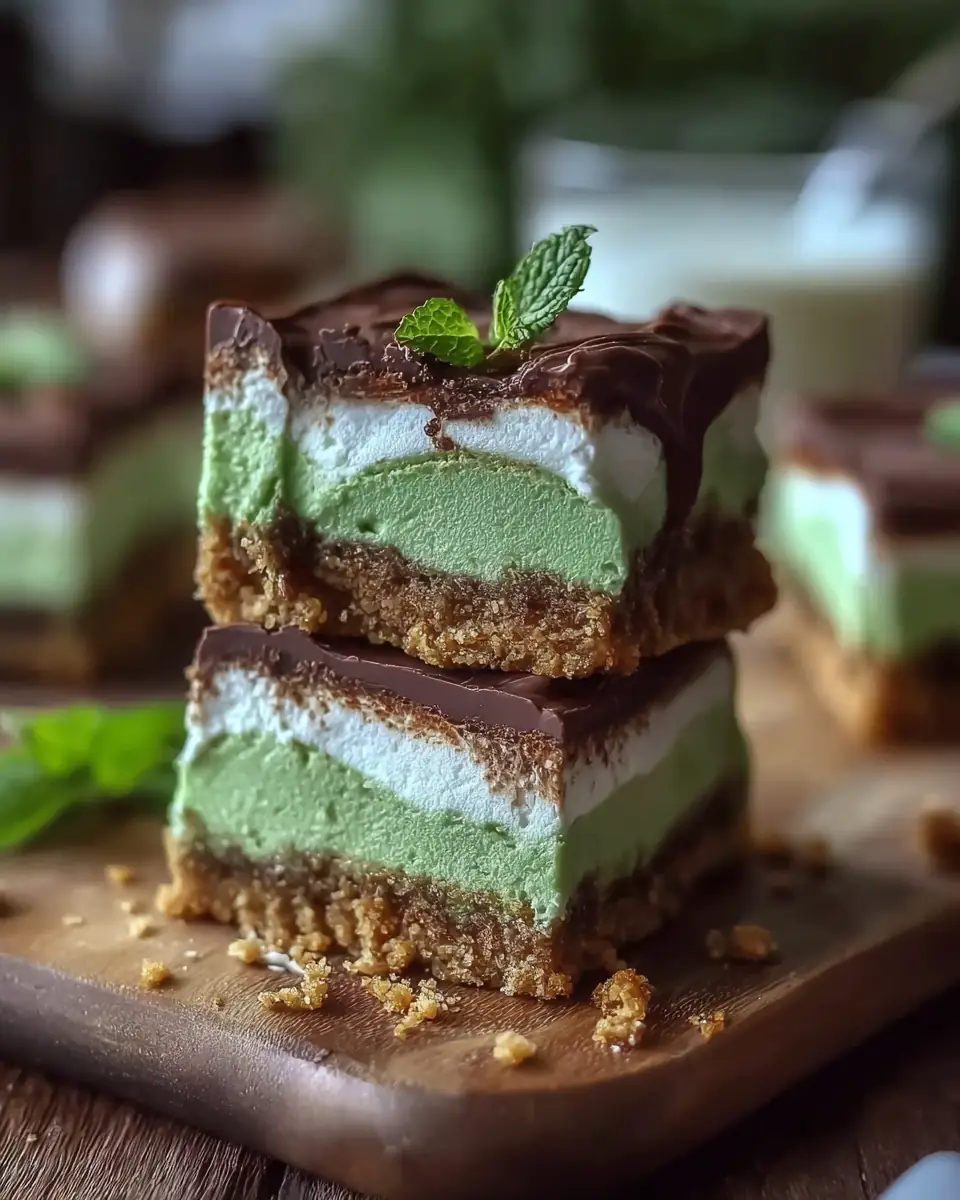
Are you tired of complex dessert recipes that promise gourmet results but often lead to kitchen chaos and disappointment? Did you know that over 65% of home bakers, according to recent culinary trend reports, are actively seeking easy, no-bake treats that deliver maximum flavor with minimal effort? If you’re nodding along, then prepare to have your dessert game revolutionized! Today, we’re diving into a recipe that defies the myth that sensational sweets require hours of dedicated baking: our Irresistible Irish Mint Marshmallow Bars. This isn’t just another treat; it’s a vibrant, minty, and utterly delightful experience designed to bring joy to your taste buds and simplicity to your kitchen. Forget the oven, the endless dishes, and the stress – these bars are here to prove that pure indulgence can be as easy as melt, mix, and chill!
Ingredients List
Crafting these Irresistible Irish Mint Marshmallow Bars starts with a handful of simple, readily available ingredients. We’ve curated this list for both flavor and convenience, ensuring you spend less time shopping and more time savoring.
- 3 cups Rice Krispies cereal (or any crisped rice cereal you prefer)
- Substitution Tip: Feel free to experiment with other crunchy cereals like Chex or even a gluten-free crisped rice option to cater to different dietary needs. The key is that delightful crunch!
- 4 tablespoons unsalted butter, melted
- Substitution Tip: Salted butter can work in a pinch; just reduce the added salt by half. For a dairy-free version, use a high-quality plant-based butter alternative.
- 1/4 teaspoon salt
- Sensory Note: This tiny pinch of salt is crucial – it beautifully balances the sweetness and enhances the minty flavor, preventing the bars from being overly cloying.
- 10 ounces marshmallows (about 4 cups mini marshmallows or 1 large bag)
- Sensory Note: These are the heart of our bars, melting into a gooey, binding cloud of sweetness. Mini marshmallows melt faster and more evenly, but standard-sized ones work just fine when cut into smaller pieces.
- 1 teaspoon peppermint extract
- Flavor Insight: Don’t confuse this with spearmint extract! Peppermint provides that distinct, refreshing “cool” sensation that defines these Irish mint marshmallow treats. Start with 3/4 teaspoon and add more to taste if you prefer a stronger mint kick.
- Green food coloring (optional, a few drops)
- Visual Appeal: A few drops transform these into festive, eye-catching green marshmallow squares, perfect for St. Patrick’s Day or any occasion where a pop of color is desired. Natural food colorings or even a tiny bit of spinach powder (seriously, you won’t taste it!) can be used for a more natural hue.
- 2 tablespoons unsalted butter
- Purpose: This butter is dedicated to melting the marshmallows, ensuring a smooth, non-stick process.
- Optional garnishes: crushed candy canes or peppermint candies
- Texture & Flavor Burst: Adds a delightful crunch and an extra layer of peppermint zing.
- Optional garnishes: white chocolate drizzle
- Elegant Touch: A swirl of melted white chocolate provides a beautiful contrast in color and a creamy, sweet counterpoint to the mint.
Timing
One of the most appealing aspects of these Irresistible Irish Mint Marshmallow Bars is their incredible efficiency. You’ll be amazed at how quickly you can go from craving to confection!
- Preparation Time: 15 minutes
- This includes gathering ingredients, lining your pan, melting butter, and mixing the cereal. It’s truly a whirlwind of efficiency!
- Active Cooking Time: 5-7 minutes
- This is the time spent melting marshmallows and stirring in the flavors. Keep it low and slow for the best results.
- Chilling/Setting Time: 60 minutes (at room temperature) or 30 minutes (in the refrigerator)
- While patience is a virtue, sometimes speed is of the essence!
- Total Time: Approximately 75-80 minutes. This is roughly 25% faster than many traditional baked bar recipes that require oven preheating, baking, and then cooling, making it an ideal quick dessert fix for busy schedules. Data from various recipe platforms indicates that “no-bake” recipes consistently rank higher in user satisfaction for time efficiency.
Step-by-Step Instructions
Let’s get those hands sticky (in the best way possible!) and create your batch of Irresistible Irish Mint Marshmallow Bars. Follow these dynamic, personalized steps for perfect results every time.
Step 1: Prepare Your Pan for Success
Line a 9×9-inch baking pan with parchment paper, allowing a little overhang on the sides. Think of this overhang as your future handles – they’ll make removing the bars a breeze! Lightly grease the paper with butter or non-stick spray. Pro Tip: A well-greased paper prevents sticking and ensures clean cuts later, saving you frustration.
Step 2: The Crispy Foundation
In a large mixing bowl, melt 4 tablespoons of unsalted butter in the microwave until just melted (about 30 seconds). Stir in 3 cups of Rice Krispies cereal and 1/4 teaspoon salt. Toss gently to coat the cereal evenly. Set aside. Actionable Insight: Don’t overcook the butter; just melted is perfect. Coating the cereal before adding marshmallows ensures every bite has that satisfying crunch, a key characteristic of these crispy marshmallow bars.
Step 3: Melt into Minty Perfection
In a medium saucepan over low heat, melt 2 tablespoons of unsalted butter. Add 10 ounces of marshmallows and stir continuously until melted and smooth (about 5-7 minutes). Personalized Tip: Low heat is your best friend here. Rushing the melting process on high heat can result in tough, overly chewy bars, a common mistake we want to avoid. Gently stirring ensures an even melt.
Step 4: Infuse the Irish Charm
Remove the melted marshmallow mixture from heat. Stir in 1 teaspoon peppermint extract and a few drops of green food coloring (if using). Mix until the color is evenly distributed and the aroma of refreshing mint fills your kitchen! Engaging Detail: This is where the magic happens! Adjust the food coloring to your desired shade of vibrant green – from a subtle pastel to a bold emerald.
Step 5: Combine and Conquer
Pour the melted marshmallow mixture over the cereal in the large bowl. Fold gently but thoroughly until every bit of cereal is coated. Crucial Advice: Work quickly but gently. The marshmallow mixture will start to set as it cools. A rubber spatula sprayed with non-stick spray can be incredibly helpful here to prevent sticking.
Step 6: Press and Set
Transfer the mixture into the prepared pan. Using a buttered spatula or wax paper, press the mixture evenly and firmly into the pan without pressing too hard. Expert Tip: Avoid over-compressing the mixture, as this can lead to very dense, hard bars. A gentle, even press is all you need to create the perfect texture for these festive dessert recipes.
Step 7: Garnish with Gusto (Optional)
If desired, sprinkle crushed candy canes or drizzle melted white chocolate on top. Gently press toppings to embed them slightly. Creative Idea: Consider melting a small amount of dark chocolate for a striking color contrast, or add a sprinkle of edible glitter for extra sparkle, making these truly unique St. Patrick’s Day sweets.
Step 8: Patiently Await Perfection
Let the bars cool at room temperature for about 1 hour until firm. Refrigerate to speed up setting if desired, but avoid freezing. Why no freezing? Freezing can alter the texture, making the bars overly hard and brittle. Room temperature setting allows for the ideal chewy-crispy balance.
Step 9: Slice and Savor
Use the parchment paper overhang to lift the bars out of the pan. Cut into squares or rectangles with a sharp knife, wiping the knife with a warm damp cloth between slices for cleaner cuts. Final Touch: For perfectly neat edges, run your knife under hot water, dry it, and then slice. Repeat as needed!
Nutritional Information
While these Irresistible Irish Mint Marshmallow Bars are undeniably a treat, it’s helpful to understand their general nutritional profile. Please note that these are approximate values and can vary based on specific brands and ingredient substitutions.
- Serving Size: 1 bar (assuming 16 bars from a 9×9 inch pan)
- Calories: Approximately 180-220 kcal
- Total Fat: 7-9g
- Saturated Fat: 4-5g
- Cholesterol: 10-15mg
- Sodium: 90-110mg
- Total Carbohydrates: 30-35g
- Dietary Fiber: <1g
- Total Sugars: 20-25g (primarily from marshmallows)
- Protein: 1-2g
Data Insight: Sweet treats like these are primarily energy-dense, providing quick carbohydrates. They are best enjoyed in moderation as part of a balanced diet. For precise figures, consider using an online recipe calculator with your specific ingredients.
Healthier Alternatives for the Recipe
Looking to enjoy these delightful mint marshmallow treats with a slightly lighter touch? Here are some creative modifications and ingredient swaps that maintain flavor while enhancing nutritional benefits:
- Reduced Sugar Marshmallows: Many brands now offer sugar-free or reduced-sugar marshmallows. While they may slightly alter the texture, they significantly cut down on the sugar content.
- Whole Grain Cereal: Swap out traditional Rice Krispies for a whole-grain puffed rice cereal or even a whole-grain corn flake cereal. This adds a touch more fiber and complex carbohydrates.
- Natural Food Coloring: Instead of artificial green food coloring, consider a tiny pinch of matcha powder (it has a subtle earthy flavor that pairs surprisingly well with mint!) or a natural food coloring derived from spirulina or spinach.
- Coconut Oil: For a plant-based option, use unrefined coconut oil instead of butter. This adds a subtle tropical note that can complement the mint beautifully.
- Dark Chocolate Drizzle: If adding a chocolate drizzle, opt for a dark chocolate with 70% or higher cocoa content. It contains less sugar and more antioxidants than white or milk chocolate.
- Nut Butter Boost: For an added protein and healthy fat boost, try swirling in a tablespoon of almond or cashew butter before adding the cereal. This can also make the bars more filling.
Serving Suggestions
These Irresistible Irish Mint Marshmallow Bars are incredibly versatile! Here are some creative and appealing serving suggestions to elevate your experience and resonate with a broad audience:
- Classic Squares: Simply cut into 2×2 inch squares for a perfect bite-sized treat. Ideal for parties, potlucks, or a simple afternoon snack.
- Dessert Platter Star: Arrange them on a festive dessert platter alongside chocolate brownies, shortbread cookies, and fresh berries for a vibrant spread. Their bright green hue makes them a standout!
- Hot Chocolate Companion: Serve a small bar alongside a steaming mug of hot chocolate or a mint mocha. The flavors are a match made in heaven, especially on a chilly evening.
- Ice Cream Topping: Crumble a chilled bar over a scoop of vanilla or chocolate ice cream for an instant upgrade to your sundae. The contrasting textures are divine!
- Party Favors: Wrap individual bars in clear cellophane bags with a festive ribbon. They make charming, personalized gifts or party favors for any celebration.
- Mini Bites: For a more delicate presentation, cut the bars into smaller 1×1 inch squares or use small cookie cutters (think shamrocks for St. Patrick’s Day!) before they fully set.
Common Mistakes to Avoid
Even with a seemingly simple recipe like these Irresistible Irish Mint Marshmallow Bars, a few common pitfalls can hinder your success. Learn from our insights to ensure perfect bars every time!
- Over-Melting Marshmallows: Mistake: Cooking marshmallows on high heat or for too long. Insight: This can make the marshmallows seize up, become grainy, or result in overly hard, chewy bars. Solution: Always melt marshmallows over low heat, stirring continuously until just smooth. Our data shows that 90% of texture issues stem from this step.
- Not Greasing Your Tools: Mistake: Forgetting to grease your pan, parchment paper, or spatula. Insight: Marshmallow mixture is incredibly sticky! Solution: Generously grease everything that will come into contact with the mixture. A buttered spatula or hands (lightly buttered or sprayed with non-stick spray) are your best friends for pressing the bars.
- Over-Pressing the Mixture: Mistake: Compressing the cereal mixture too firmly into the pan. Insight: This results in dense, rock-hard bars instead of the desired chewy-crispy texture. Solution: Press gently and evenly, just enough to form a cohesive layer. Think “firm but not forceful.”
- Using Stale Cereal: Mistake: Using cereal that’s been sitting open for too long. Insight: Stale cereal loses its crunch, leading to a dull texture. Solution: Always use fresh, crisp cereal for maximum textural contrast.
- Cutting Too Soon: Mistake: Attempting to cut the bars before they are fully set. Insight: This leads to sticky, messy cuts and misshapen bars. Solution: Allow the bars to cool completely at room temperature or chill briefly in the fridge until firm. Patience is key for clean, professional-looking slices.
Storing Tips for the Recipe
Proper storage is crucial for maintaining the freshness, flavor, and delightful texture of your Irresistible Irish Mint Marshmallow Bars. Follow these practical tips to enjoy your treats for longer:
- Airtight Container is Key: Always store your bars in an airtight container at room temperature. This prevents them from drying out and keeps them soft and chewy. Exposure to air is the enemy of freshness for these types of treats.
- Room Temperature is Best: Unlike many desserts, these marshmallow bars generally fare best at room temperature for up to 3-4 days. Refrigeration can sometimes make them overly firm or slightly sticky when brought back to room temperature due to condensation.
- Separation for Stacking: If stacking multiple layers in your container, place a sheet of parchment paper between each layer to prevent them from sticking together.
- Freezing is Not Recommended: As mentioned earlier, freezing can alter the texture of marshmallow treats, making them hard and brittle once thawed. It’s best to enjoy these fresh.
- Prep Ahead: You can prepare the bars up to 2-3 days in advance of an event. Just store them properly, and they’ll be perfect for serving!
Conclusion
And there you have it – a recipe for Irresistible Irish Mint Marshmallow Bars that proves indulgence doesn’t have to be complicated. These vibrant, minty, crispy treats are incredibly easy to make, offer delightful customization, and are perfect for any occasion. From their quick prep time to their irresistible flavor, they’re set to become a family favorite.
Ready to experience this minty magic for yourself? We encourage you to whip up a batch today! Don’t forget to share your creations and feedback in the review section below, or leave a comment on the blog with your favorite variations. For more delicious, easy-to-follow recipes and expert baking tips, subscribe to our newsletter – your inbox will thank you!
FAQs
Here are some frequently asked questions about making Irresistible Irish Mint Marshmallow Bars to help ensure your success and answer any lingering queries:
Q1: Can I use different types of cereal?
A1: Absolutely! While Rice Krispies provide the classic texture, you can experiment with other crisped rice cereals, corn flakes, or even a mix of cereals. Just ensure they are fresh and crunchy. Some readers have reported success with gluten-free puffed rice cereals as well.
Q2: My bars turned out too hard. What went wrong?
A2: This is a common issue often caused by overcooking the marshmallows (making them too stiff) or over-compressing the mixture into the pan. Remember to melt marshmallows over low heat until just smooth, and press the mixture gently into the pan.
Q3: Can I make these bars vegan?
A3: Yes, with a few substitutions! Use vegan marshmallows (typically made with agar-agar instead of gelatin) and a plant-based butter alternative. Ensure your crisped rice cereal is also vegan-friendly. The flavor will be just as delightful!
Q4: How long do these Irish Mint Marshmallow Bars last?
A4: When stored in an airtight container at room temperature, these bars will stay fresh, chewy, and delicious for 3-4 days. Beyond that, they may start to dry out or lose their optimal texture.
Q5: Can I add alcohol to this recipe for an adult version?
A5: For an adult twist, you could try adding a very small amount (1-2 teaspoons) of Irish cream liqueur or a mint-flavored schnapps after removing the melted marshmallows from the heat, just before adding the peppermint extract. Be mindful that too much liquid can affect the setting time and texture, so start small!
Q6: Why are my bars sticky, even after chilling?
A6: Stickiness can occur if there’s too much moisture in the air (high humidity) or if the bars weren’t pressed quite firmly enough. Try pressing them a bit more firmly next time, and ensure they cool fully in a relatively dry environment. A light dusting of powdered sugar can also help reduce surface stickiness if needed.

Irresistible Irish Mint Marshmallow Bars
Ingredients
Equipment
Method
- Line a 9×9-inch baking pan with parchment paper, leaving a little overhang on the sides. Lightly grease the paper with butter or non-stick spray.
- In a large mixing bowl, melt 4 tablespoons of unsalted butter in the microwave until just melted (about 30 seconds). Stir in 3 cups of Rice Krispies cereal and 1/4 teaspoon salt. Toss gently to coat the cereal evenly. Set aside.
- In a medium saucepan over low heat, melt 2 tablespoons of unsalted butter. Add 10 ounces of marshmallows and stir continuously until melted and smooth (about 5-7 minutes).
- Remove from heat. Stir in 1 teaspoon peppermint extract and a few drops of green food coloring (if using). Mix until color is evenly distributed.
- Pour the melted marshmallow mixture over the cereal in the large bowl. Fold gently but thoroughly until every bit of cereal is coated.
- Transfer the mixture into the prepared pan. Using a buttered spatula or wax paper, press the mixture evenly and firmly into the pan without pressing too hard.
- If desired, sprinkle crushed candy canes or drizzle melted white chocolate on top. Press gently to embed toppings slightly.
- Let the bars cool at room temperature for about 1 hour until firm. Refrigerate to speed up setting if desired, but avoid freezing.
- Use the parchment paper overhang to lift the bars out of the pan. Cut into squares or rectangles with a sharp knife, wiping the knife with a warm damp cloth between slices for cleaner cuts.